
Now that you are working from home, it is important to create a functional, ergonomic workspace designed just for you. Your muscles learn what you teach them and if you teach them that they don’t have to work, then you could be at risk for injury down the road.
Here are several steps you can incorporate in your home office to help make you more comfortable, efficient and productive:
Get off the couch – It is important to consider your back health during this time and a good reminder to maintain proper curvatures of the spine. Get yourself a good chair and add pillows if needed. Your hips and knees should be at 90 degrees and you want to be sure that you keep the lower back supported. Add in a foot stool or books for your feet, too, if needed.
Computer height – Whether you are sitting or standing, the middle of the screen should be in line with your eyes (some experts recommend the top of the screen even with your eyebrows). Books, shoe boxes, or baking racks can make great risers for your desk or table – get creative! Also, consider a wireless keyboard and mouse so your shoulders can stay relaxed and your elbows can maintain a 90 degree bend.
Designate a workspace – Never use your bed, coffee table, or lap for your work. Not only does it promote unhealthy body positions, but you are also promoting less work-life balance. It is important to set boundaries with work when you can’t leave your home! Designate start and stop times and make sure you set aside an office space. Another handy tip – set it up near a window!
Take breaks – It is very easy to sit at your home office and realize that you haven’t gotten up for the past four hours. When working from home, you are not getting up and seeing your co-workers like you are used to, so it is even more important that you get up and move at least five minutes every hour. Set reminders in your calendar or use post-it notes to get up and move. Use this as an opportunity to refill your water bottle, stretch, take the dog for a walk, and give your eyes the break they need from the computer screen.
Walkie talkie – Thankfully, many of us have access to Bluetooth headsets (if not, order one!) and it makes it easy to get up and walk around your home when you’re in a meeting.
Don’t ignore your fitness tracker – Listen to the notifications which remind you to get up and move every hour. You can still try to reach your goals – get your steps in, close the rings – whatever your tracker tells you to do, do it!
Stretching for Success
Counter Stretch
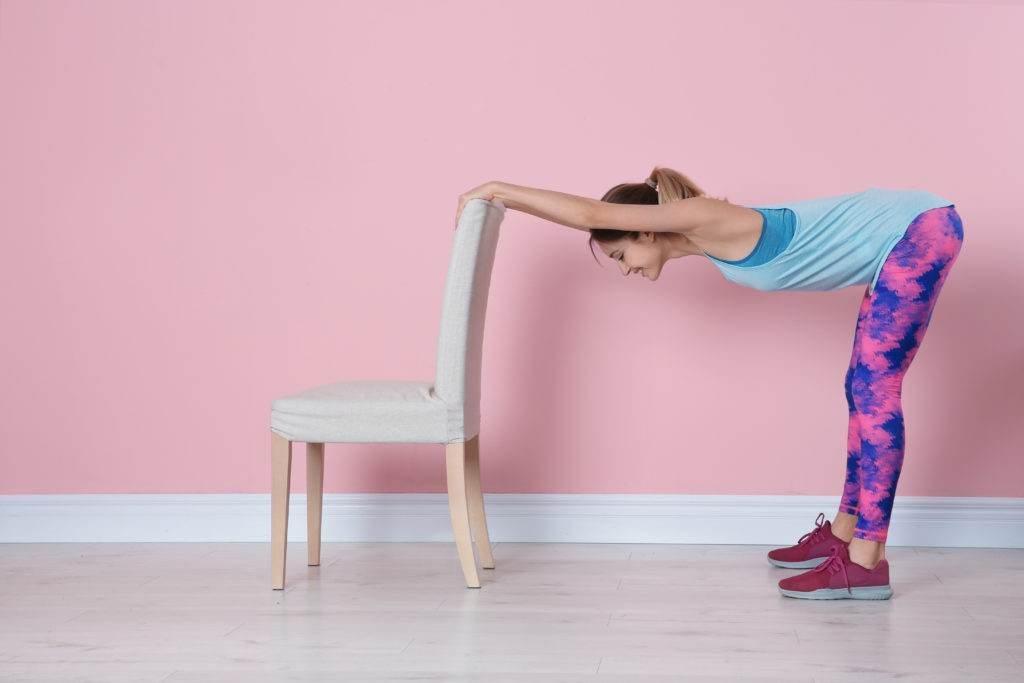
Begin by standing and facing a table, counter, or sturdy chair that is about waist high (the table/counter can be lower than your waist if you are more advanced, higher if you are just starting.)
- Keep your feet pointed straight and place your hands on the table/counter you are facing.
- Walk your feet back so that your weight is in your toes.
- Keep the hips, knees and feet in alignment.
- Kick your buttocks/hips back to place an arch in your lower back.
- Keep your elbows locked out and tighten your quads.
- Hold for 15-30 seconds.
Half-Kneeling Psoas Stretch
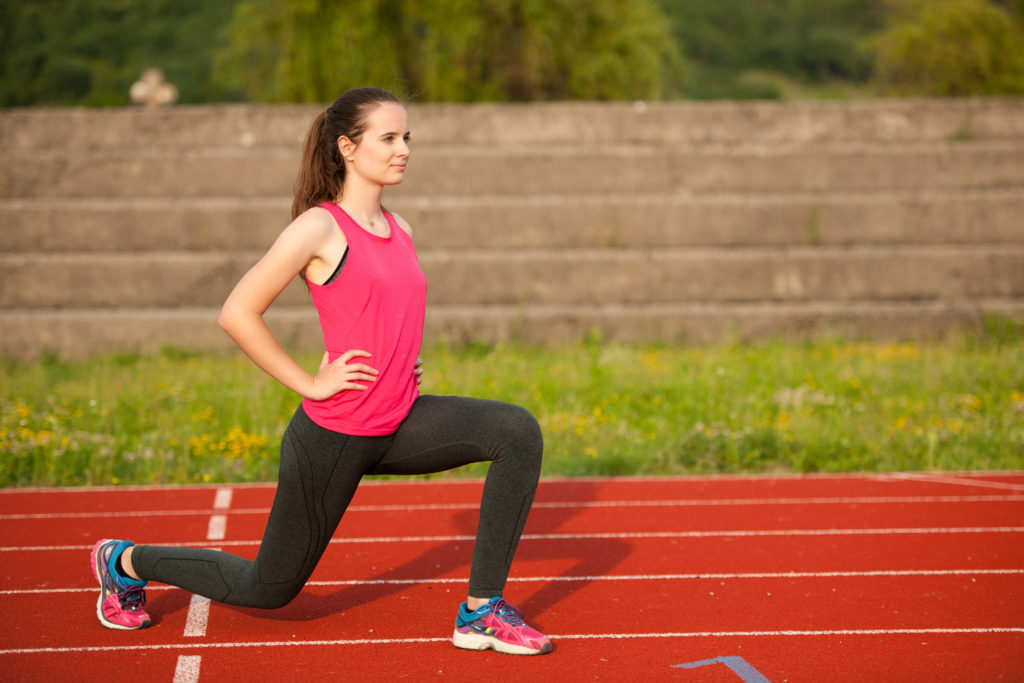
- Begin by kneeling on the floor. Move the right leg in front of you, so that the right thigh is parallel to the floor and the knee is bent at a 90-degree angle. The left knee should remain on the floor, aligned underneath the left hip.
- Place your hands on your hips and, while keeping your back straight, shift your hips forward until you feel a stretch. You will feel it through the front of the left thigh and groin area.
- Hold the stretch for 20 to 30 seconds.
- Switch legs and repeat until you feel adequately stretched.
Quadruped Side Bend
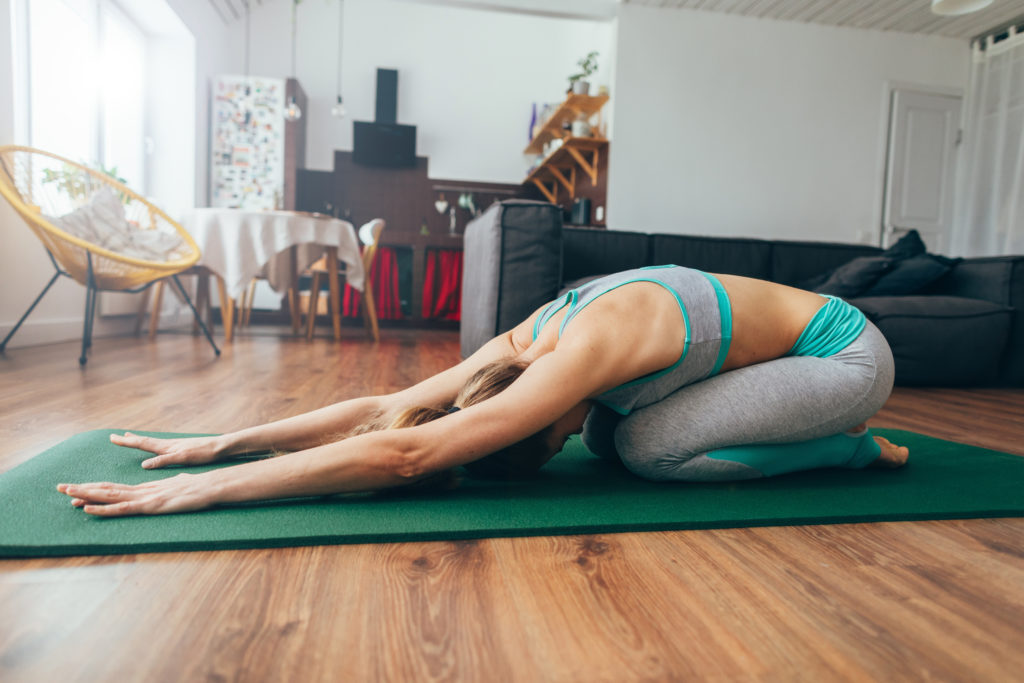
- Start in kneeling, with your hands stretched in front of you. If you have tight quads that prevent you from getting into the deep squat, just go as far as you can go comfortably.
- Move your hands to one side so they are at a 45-degree angle (or more) to your body. You should feel a good stretch in this position.
- Move in and out of the stretch 10 times, then hold for 30-60 seconds. Repeat three times, then switch to the opposite side.
Downward Dog
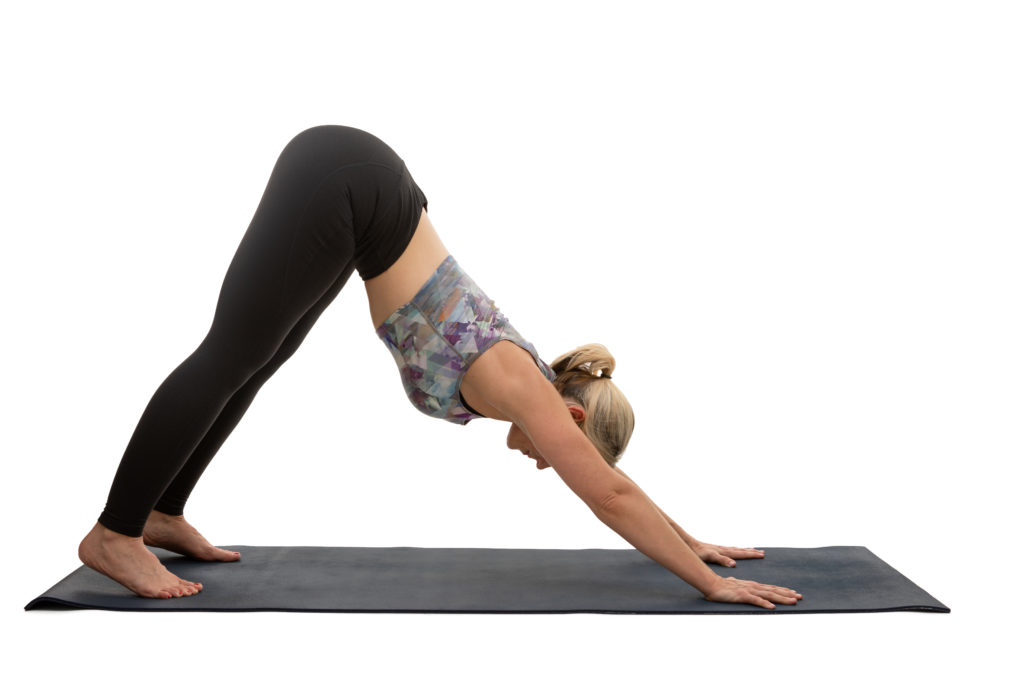
- Begin in a kneeling position on your mat with hands directly under shoulders, fingers spread wide.
- Tuck your toes under and engage your abdominals as you push your body up off the mat so only your hands and feet are on the mat.
- Press through your hands moving your chest gently toward your thighs and your heels gently toward the floor.
- Relax your head and neck and breathe fully.
Pigeon Pose
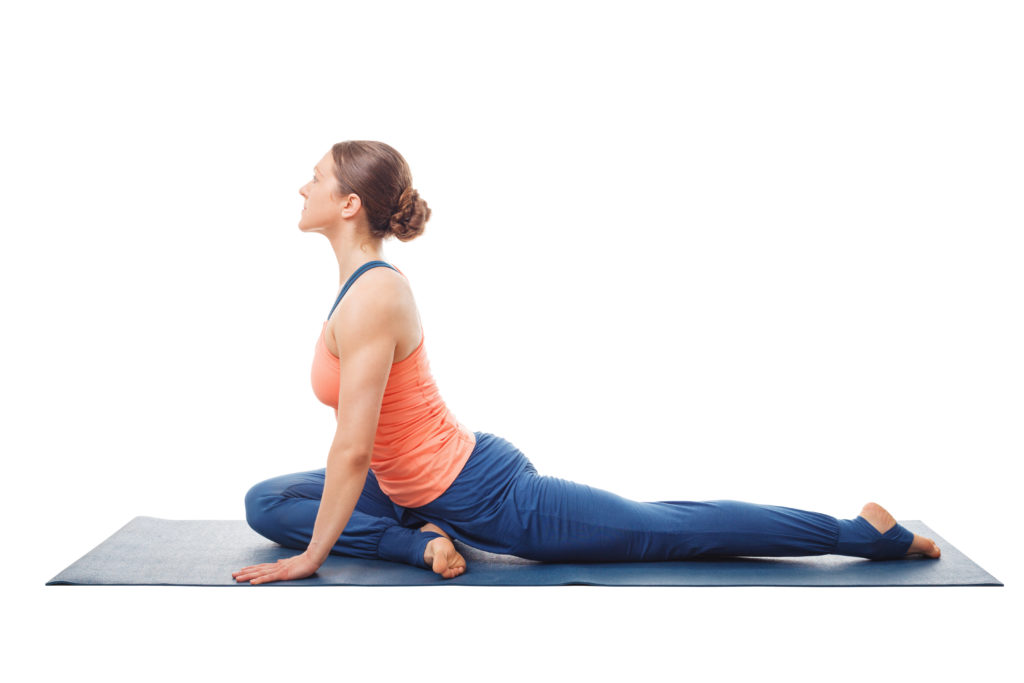
- From Downward Facing Dog, bring the right leg up into a down dog split.
- Bend your right knee and bring that leg forward as if you were going to step into a lunge. Instead of placing your foot down as you would for a lunge, bring your right knee to the floor on the outside of your right hand. The right shin may angle back towards the left hip or be more parallel to the front of your mat, depending on your flexibility.
- Release your left knee to your mat. Your left leg should be flat on the floor. Look backward and make sure that your left foot is pointing straight back.
- Square your hips towards the front of your mat.
- Take padding (a folded blanket works well) under the right side of your hip as necessary to make the pose more comfortable. If you are new to the pose, you can halt here.
- If you feel stable, bring your torso down into a forward bend over your right leg.
- Let the weight of your body rest on your right leg. Place your forehead on the floor.
- Continue squaring your hips and breathing into any tightness.
- Come back up, bringing your hands in line with your hips.
- To release, curl your left toes under and step back into a Downward Facing Dog.
- Repeat the pose on the other side.